This is lab number 3 in this series. If you have not already completed the previous lab, please start at Lab 2: Create an Ubuntu LXC.
- Open https://opnsense.org/download/
- Pick “DVD” from the “Select the image type” dropdown box.
- Right click the “Download OPNsense” button.
- Click “Copy link”.
- Login to your proxmox server.
- Click “Datacenter”.
- Click “Storage”.
- Identify which storage path includes “ISO Image” in its “Content” column
- On the left side of the screen, expand your node.
- Scroll down until you see the storage path you identified in step 4.
- Click the storage.
- Click “ISO Images”.
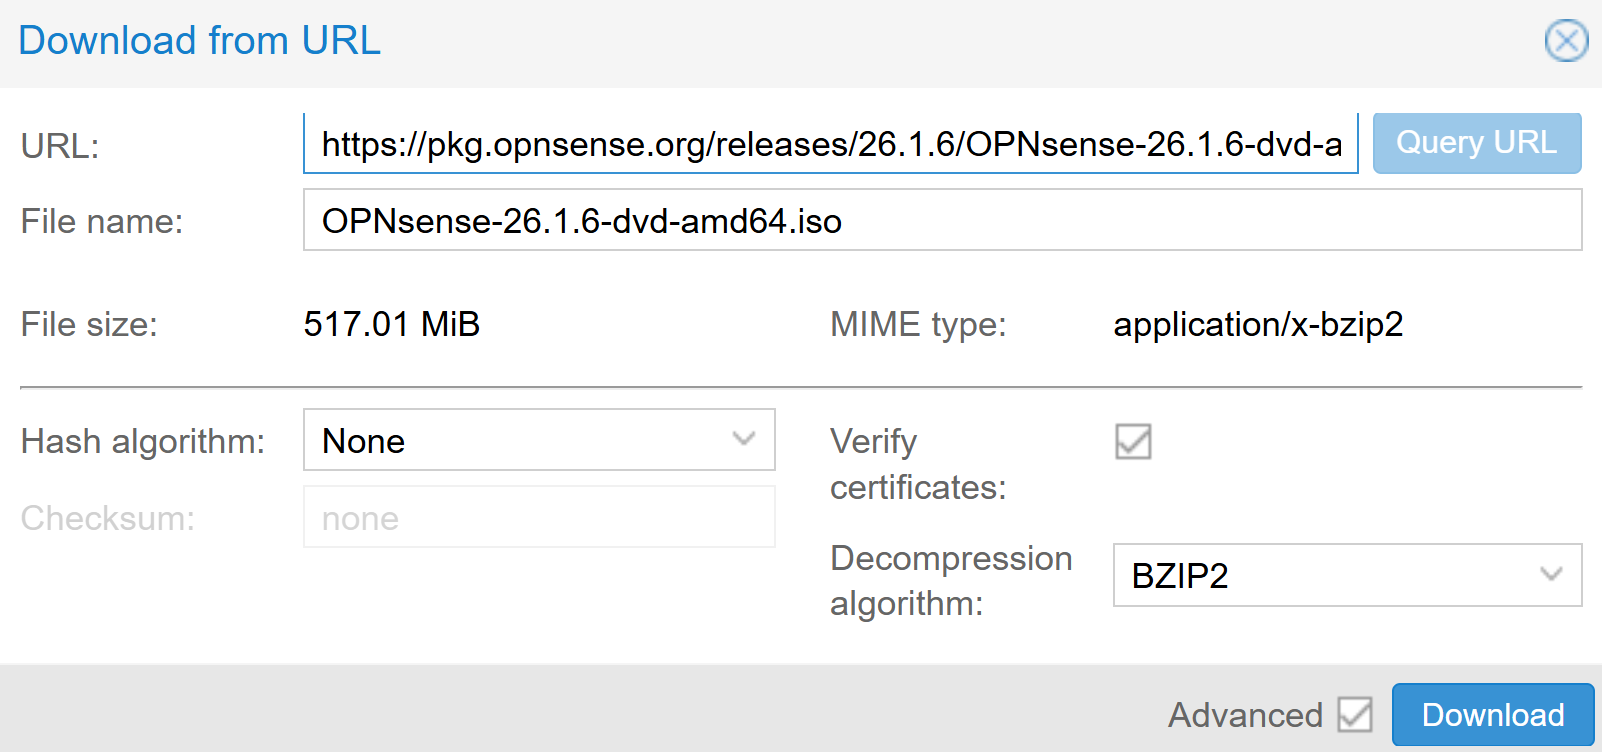
- Click “Download from URL”.
- Right click in the “URL:” textbox.
- Click “Paste”.
- Click “Query URL”.
-
Click “Download”.
- Right click on your proxmox node (The default name is “pve”.)
-
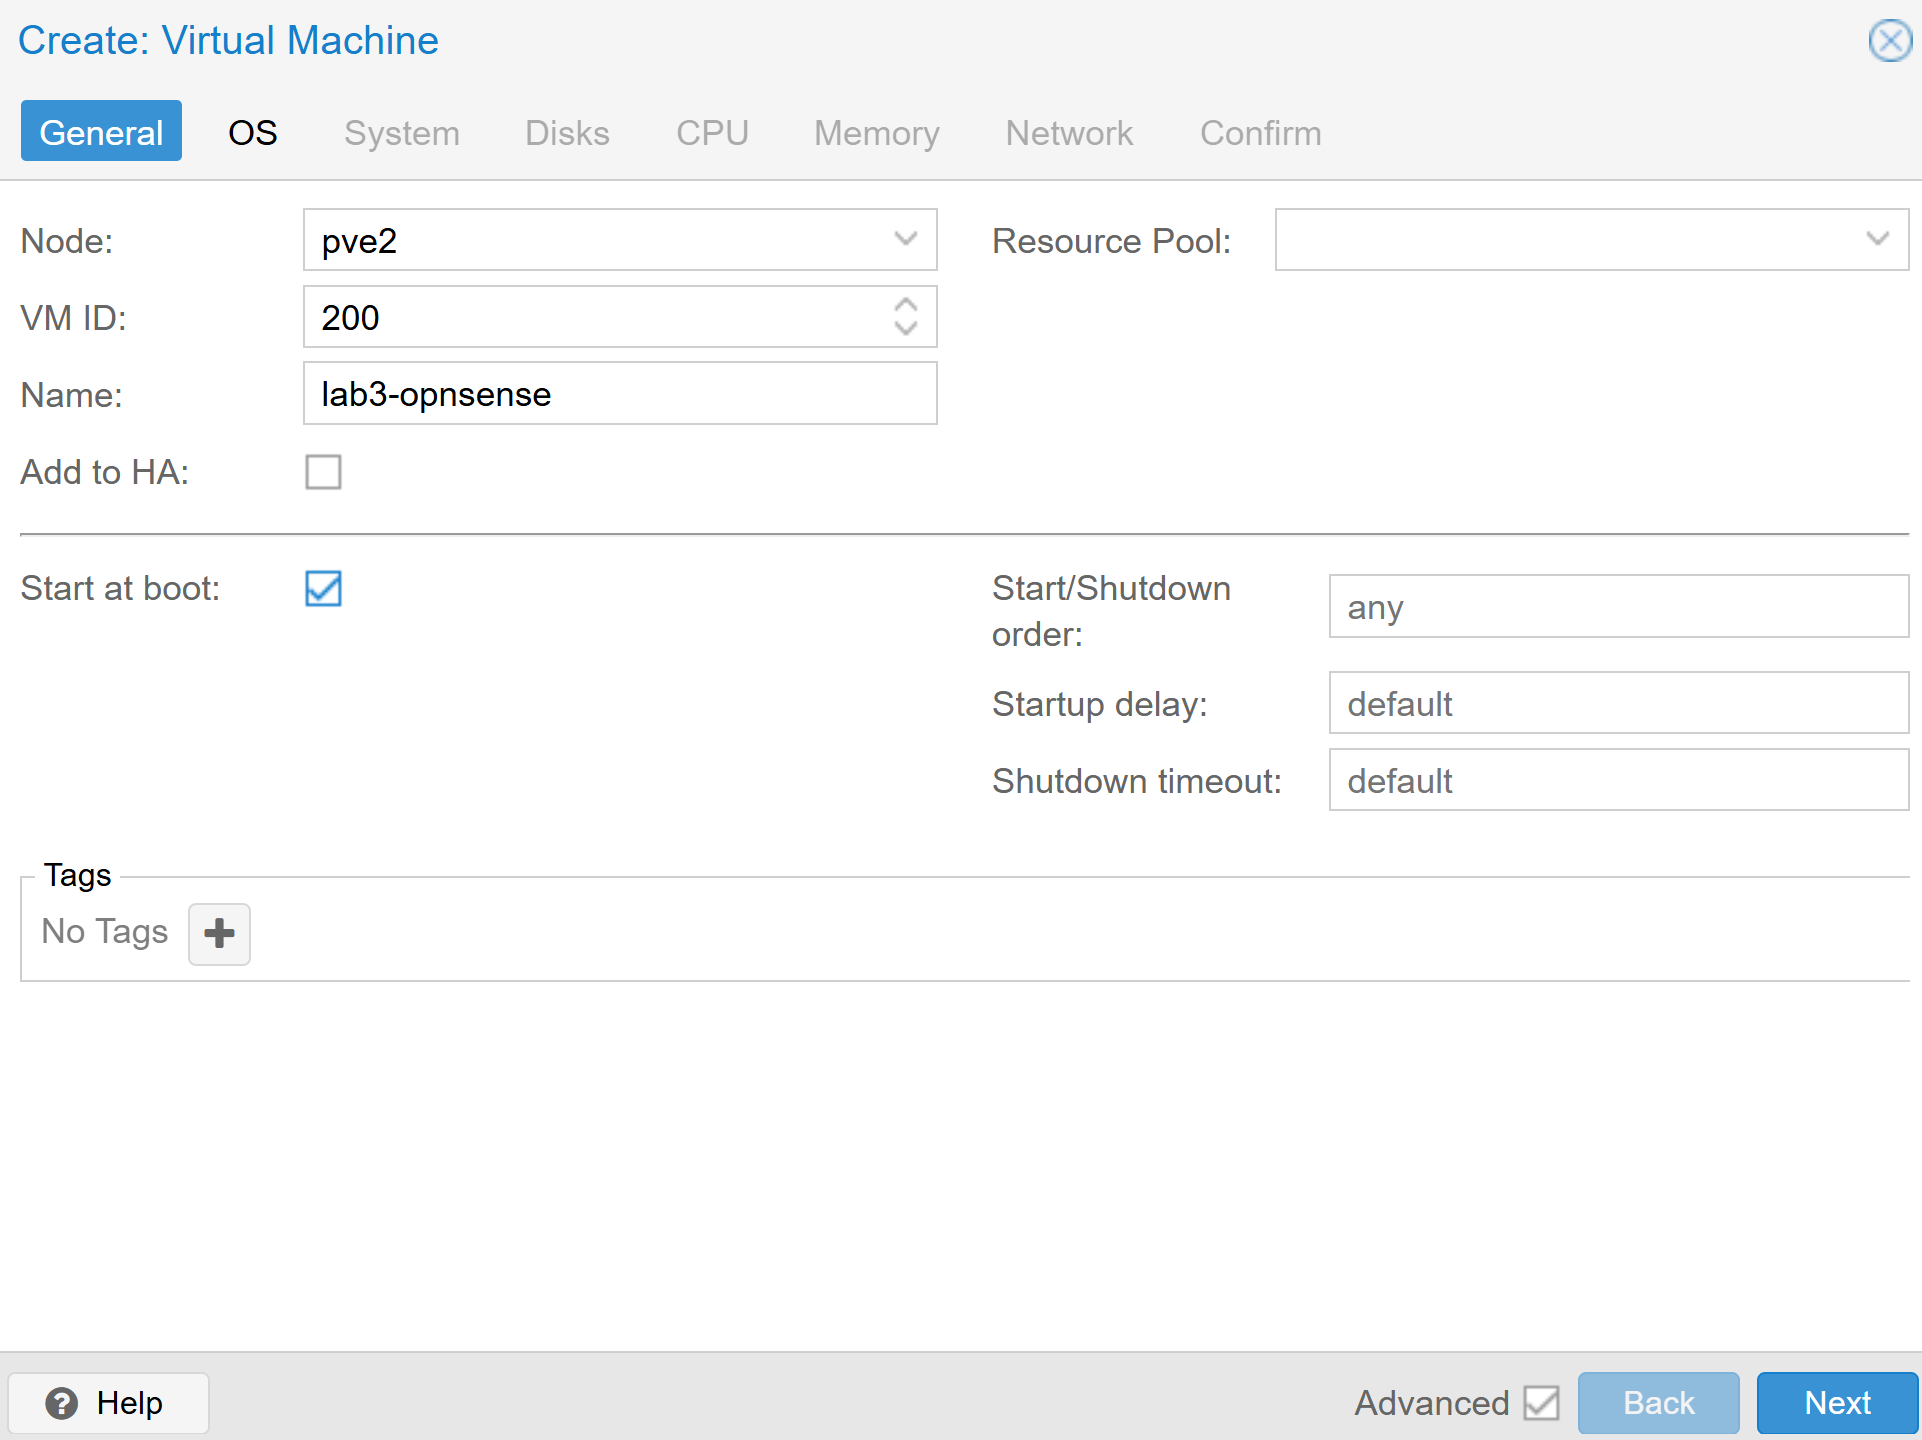
Click “Create VM”.
Use the following settings:
- General
- Node: pve
- VM ID: 200
- Name: lab3-opnsense
-
Start at boot: Checked
- OS
- Use CD/DVD disc image file (iso): Yes
- Storage: Pick the storage path where “ISO Image” are stored. This is the same storage path as the one identified in step 8 above.
- ISO Image: OPNsense-26.1.6-dvd-amd64.iso
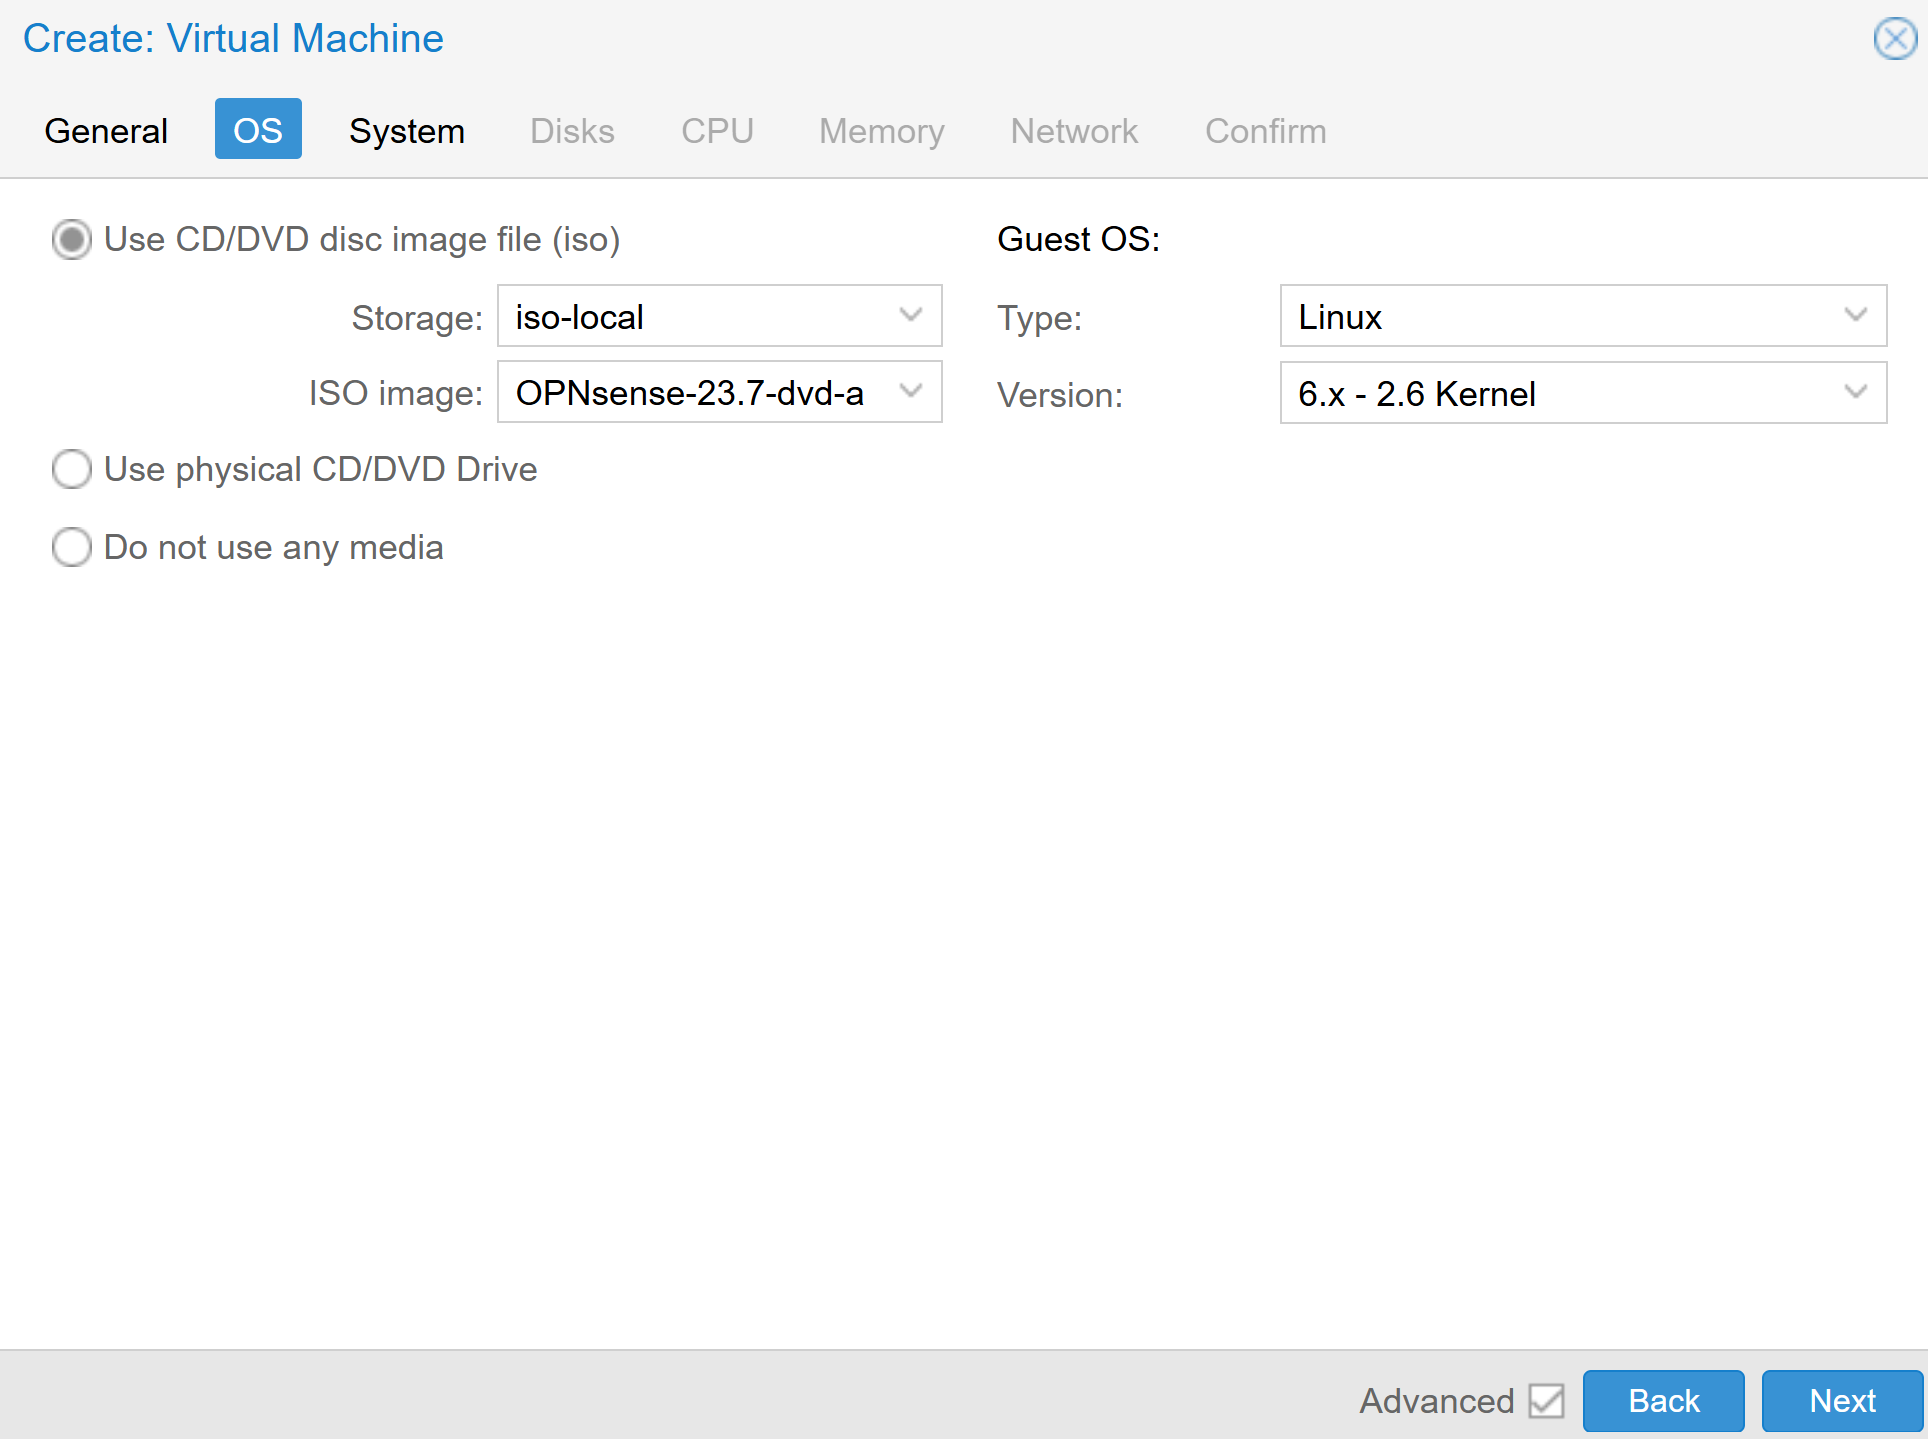
- Use CD/DVD disc image file (iso): Yes
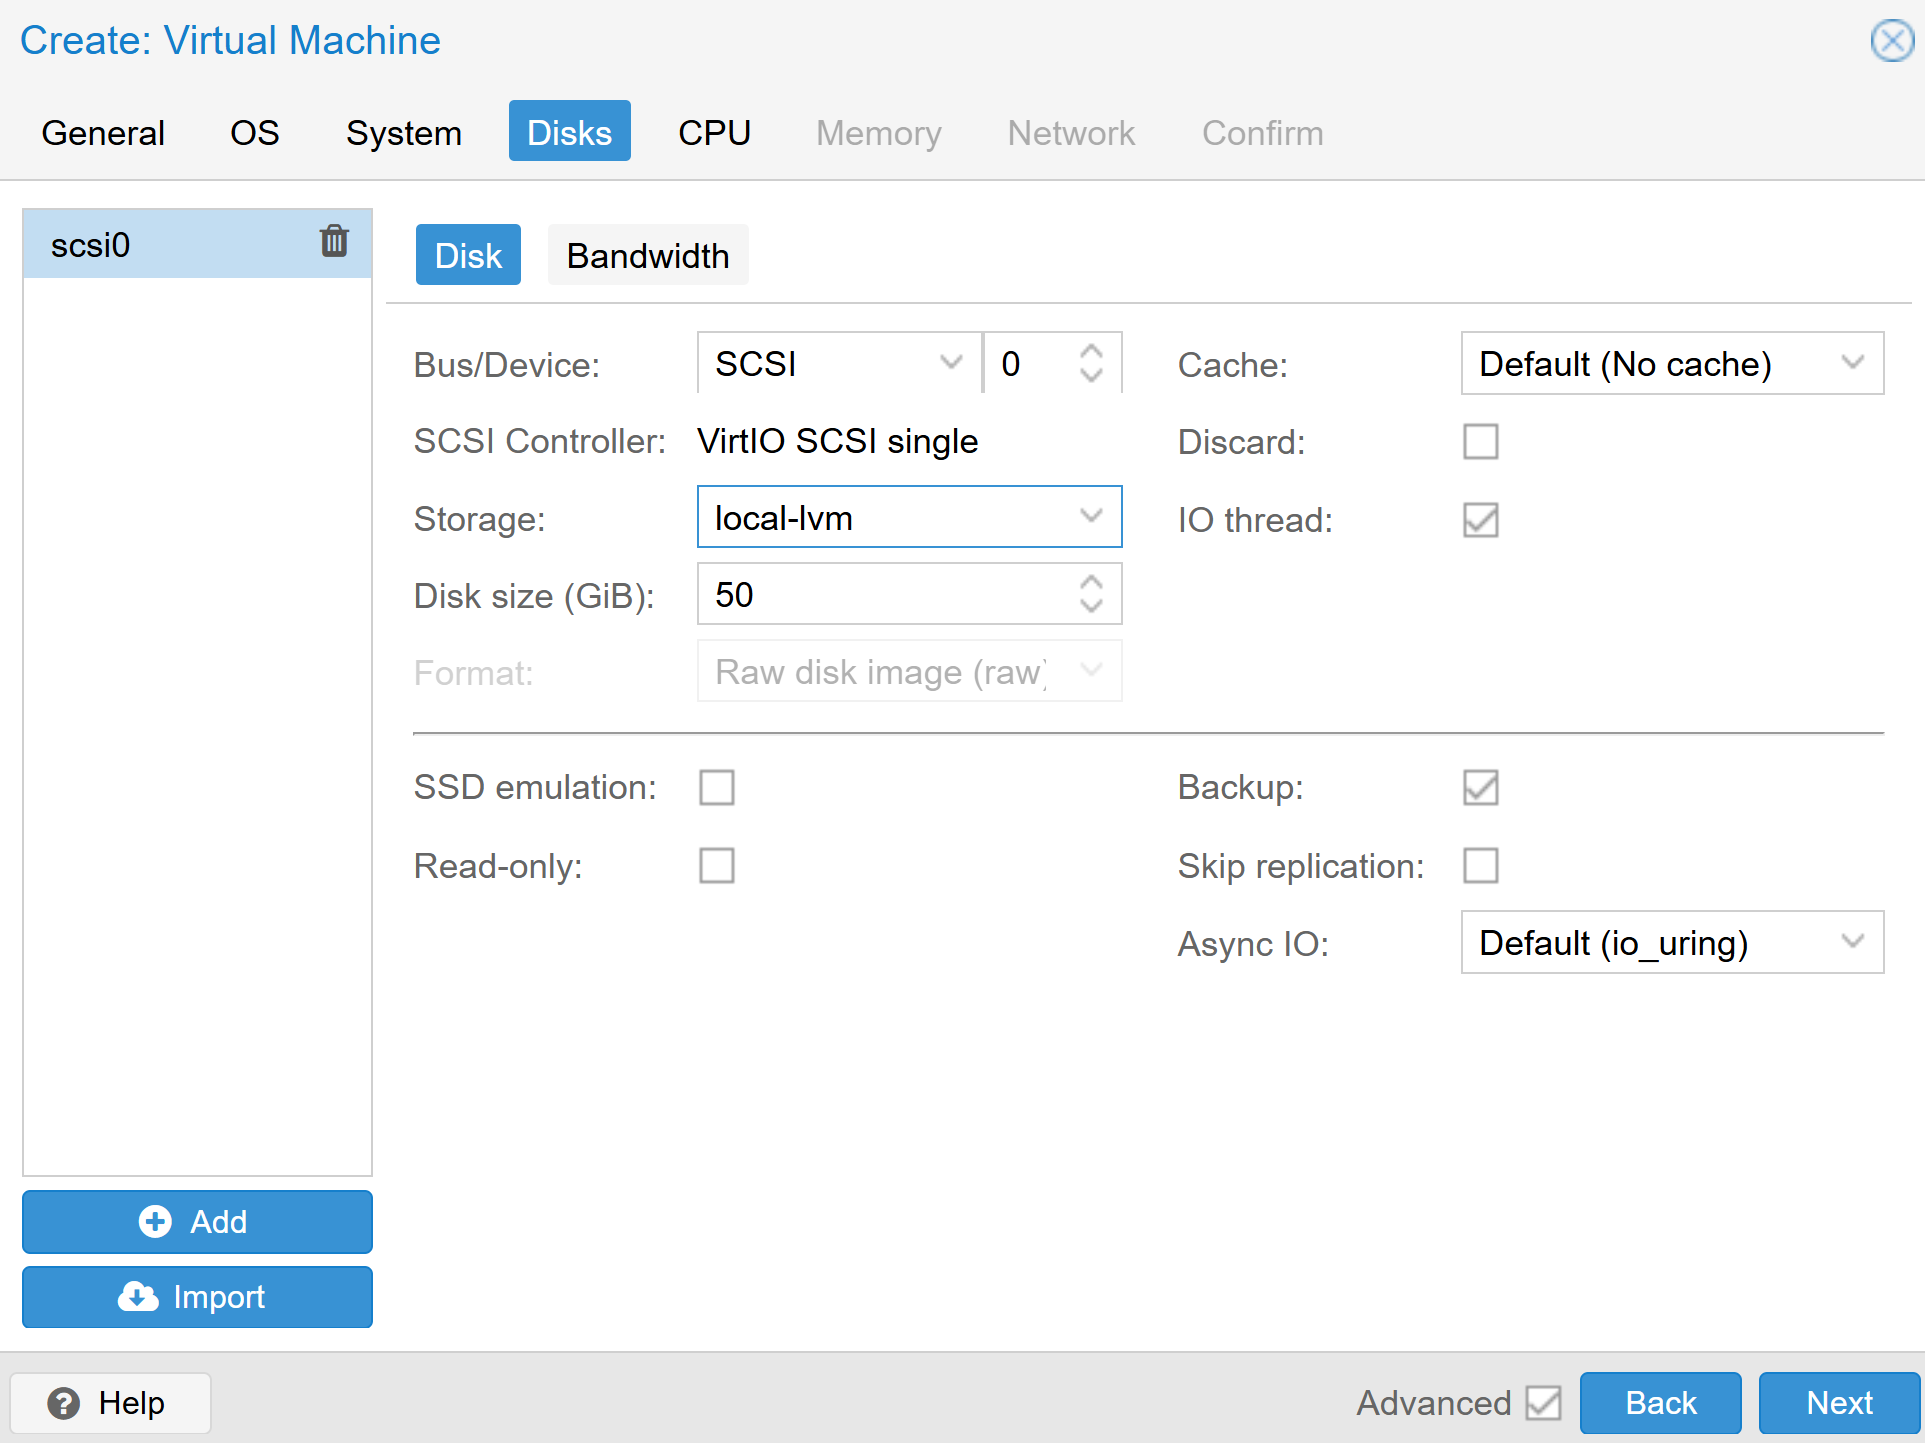
- Disks
- Storage: Choose where your VM virtual drive will be located
- Disk size (GiB): 50
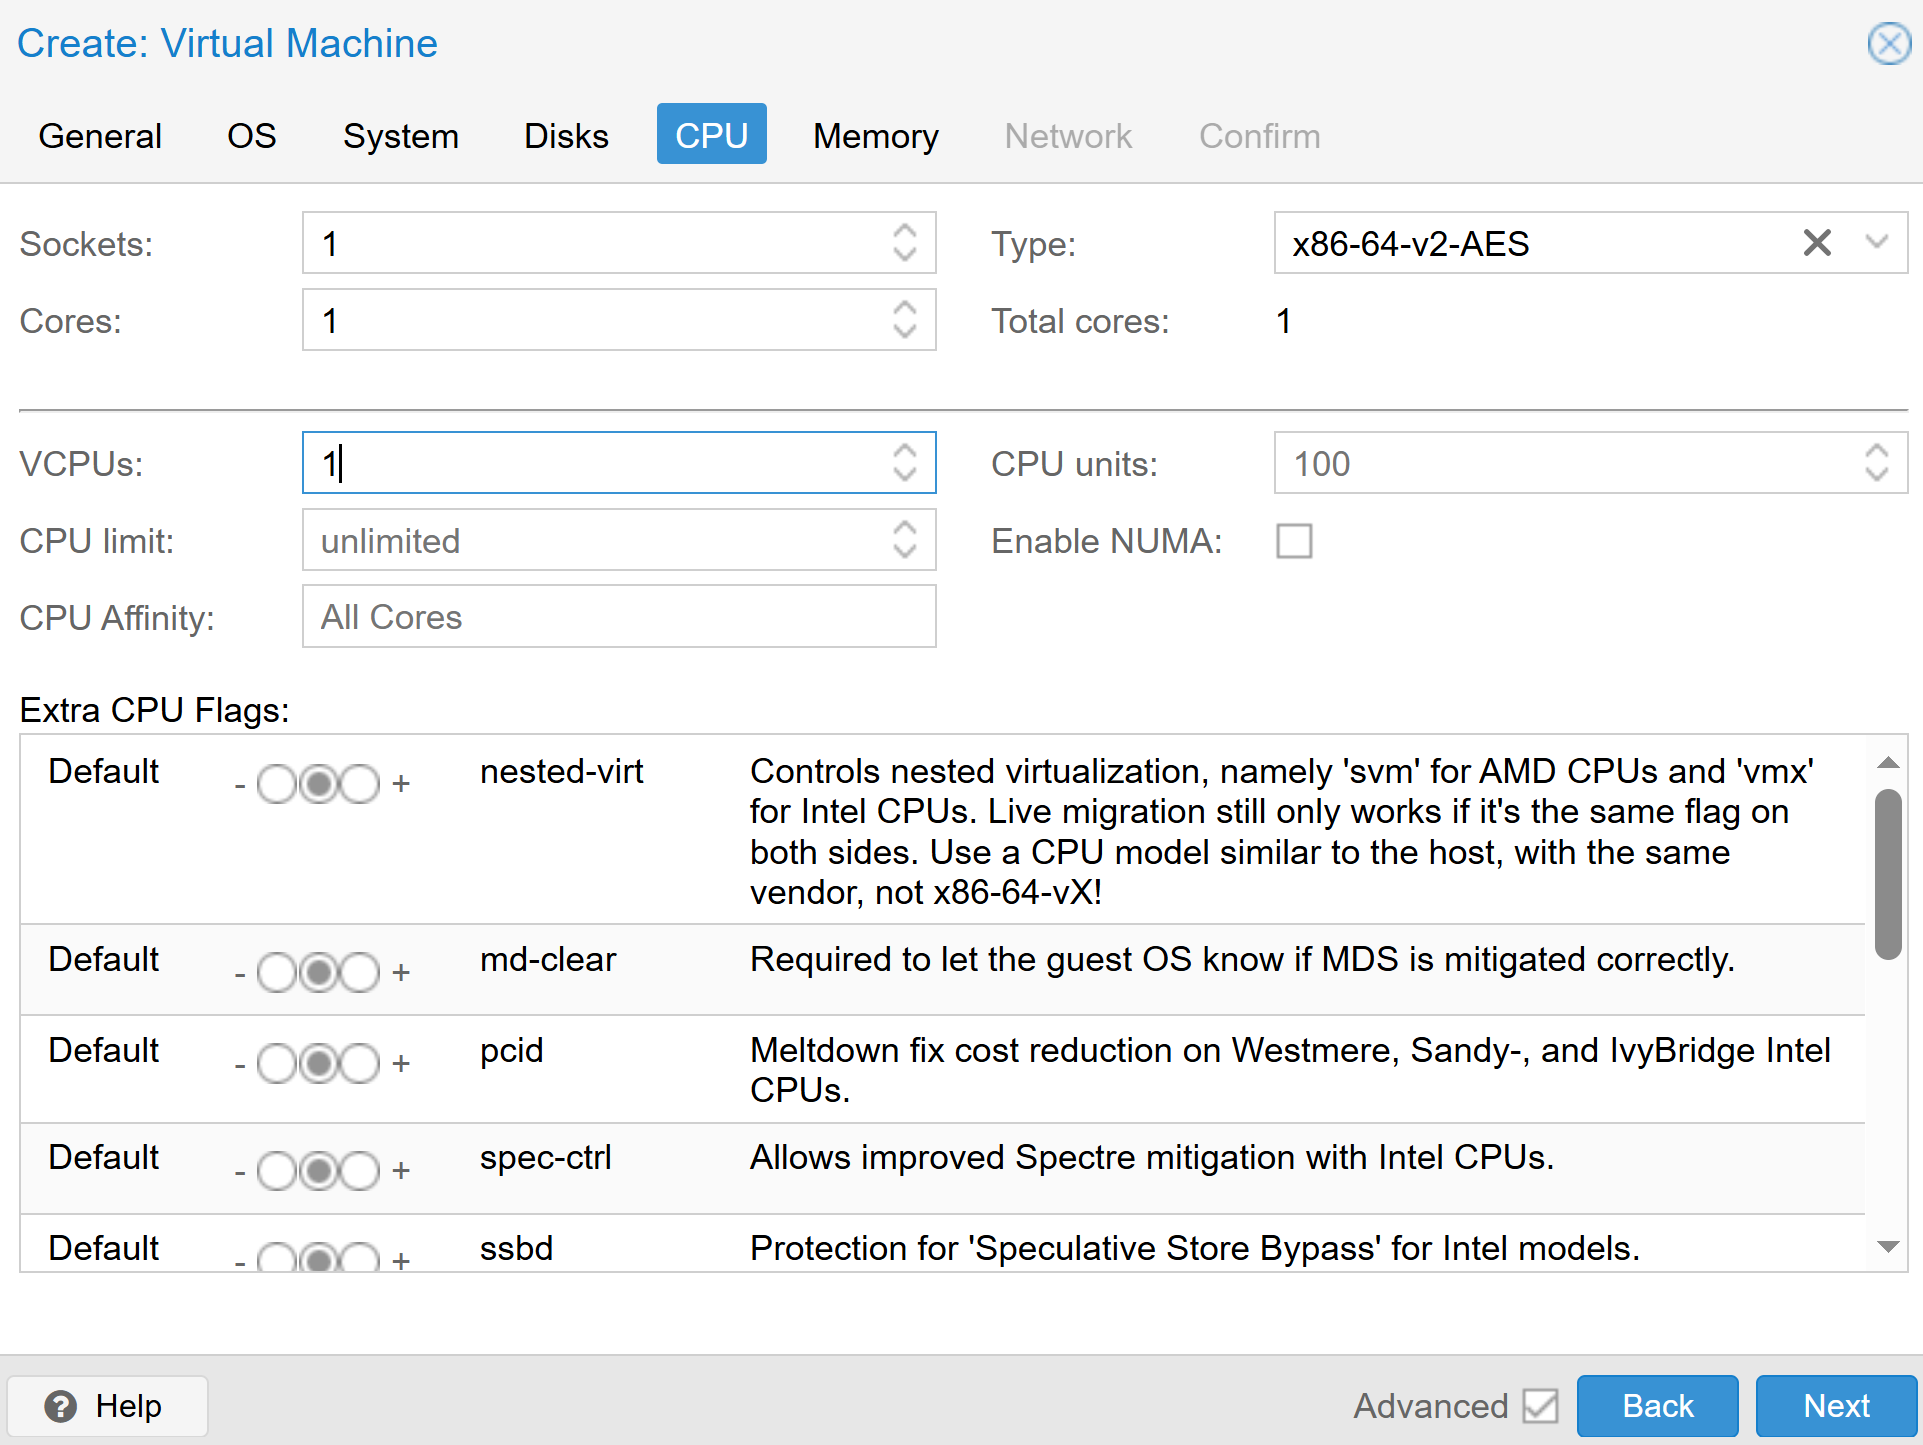
- CPU
- Sockets: 1
- Cores: 1
- Type: x86-64-v2-AES
- Total cores: 1
- VCUPS: 1
- CPU limit: unlimited
- CPU Affinity: All Cores
- CPU units: 100
- Enable NUMA: Unchecked
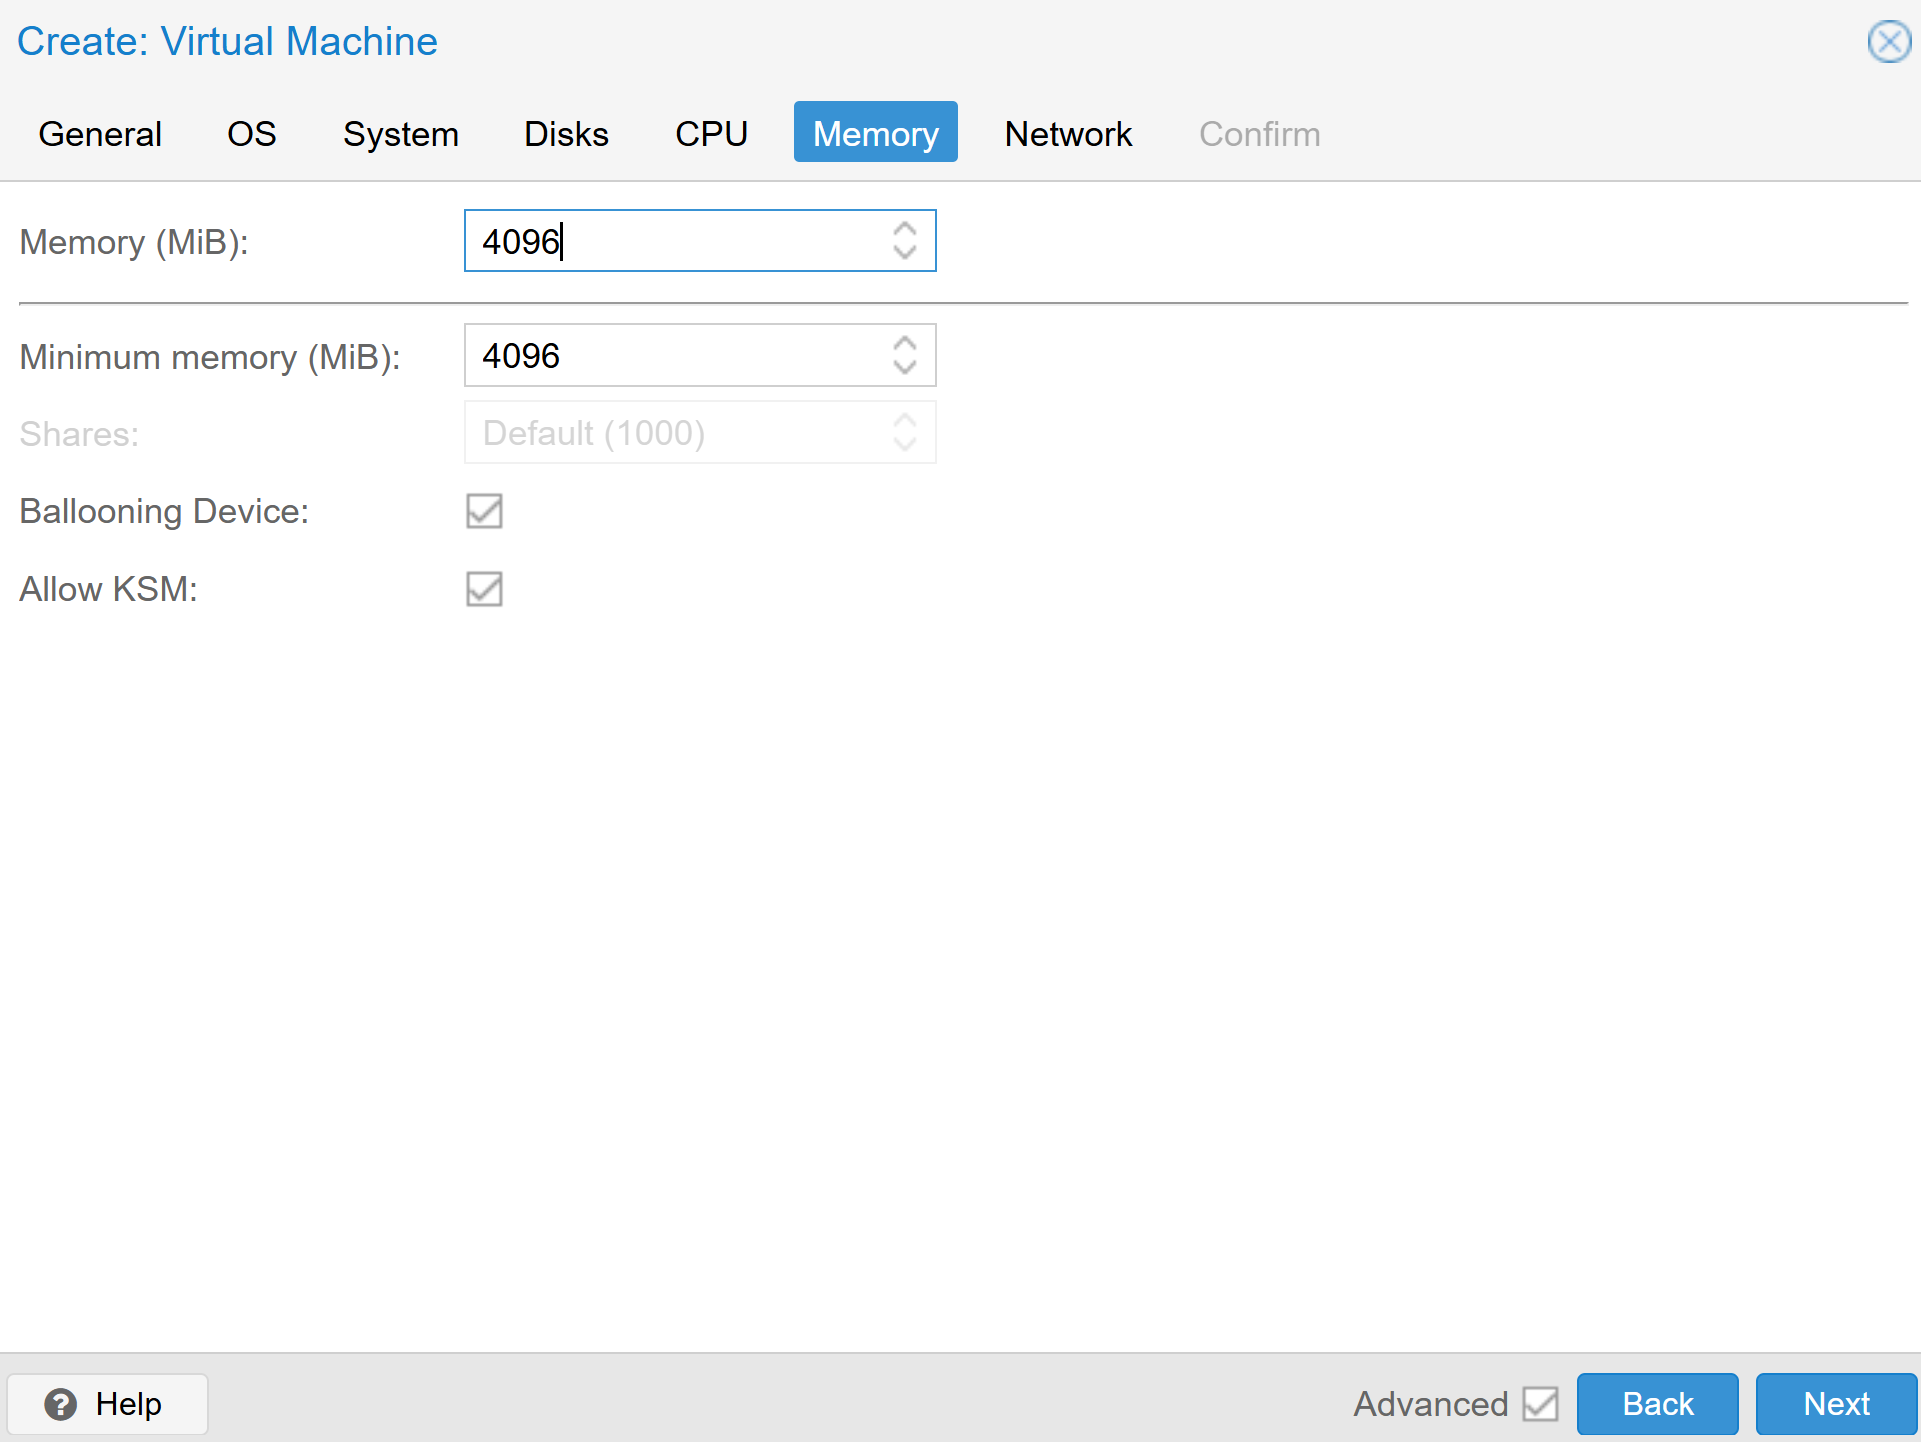
- Memory
- Memory (MiB): 4096
- Minimum memory (MiB): 4096
- Network
- Bridge: vmbr0
- VLAN Tag: no VLAN (this will be your WAN interface)
- Firewall: Checked
- Model: VirtIO (paravirtualized)
- MAC address: auto
- Disconnect: Unchecked
- MTU: Same as bridge
- Rate limit (MB/s): Unlimited
- Multiqueue: Leave blank

- General
- Click “Confirm”.
- Click “Finish”. Your VM is created but it only has a single network interface. It needs to have at least two interfaces so one can be configured as the “WAN” (which we will connect to our existing network) and the other, the “LAN” (which will be a seperate routed network to which we will connect other proxmox LXCs and VMs.)
- Expand your node.
- Click your “lab3-opnsense” VM.
- Click “Hardware”.
- Click “Add”.
-
Click “Network Device”.
Use the following settings:
- Bridge: vmbr0
- VLAN Tag: 20
- Firewall: Checked
- Model: VirtIO (paravitualized)
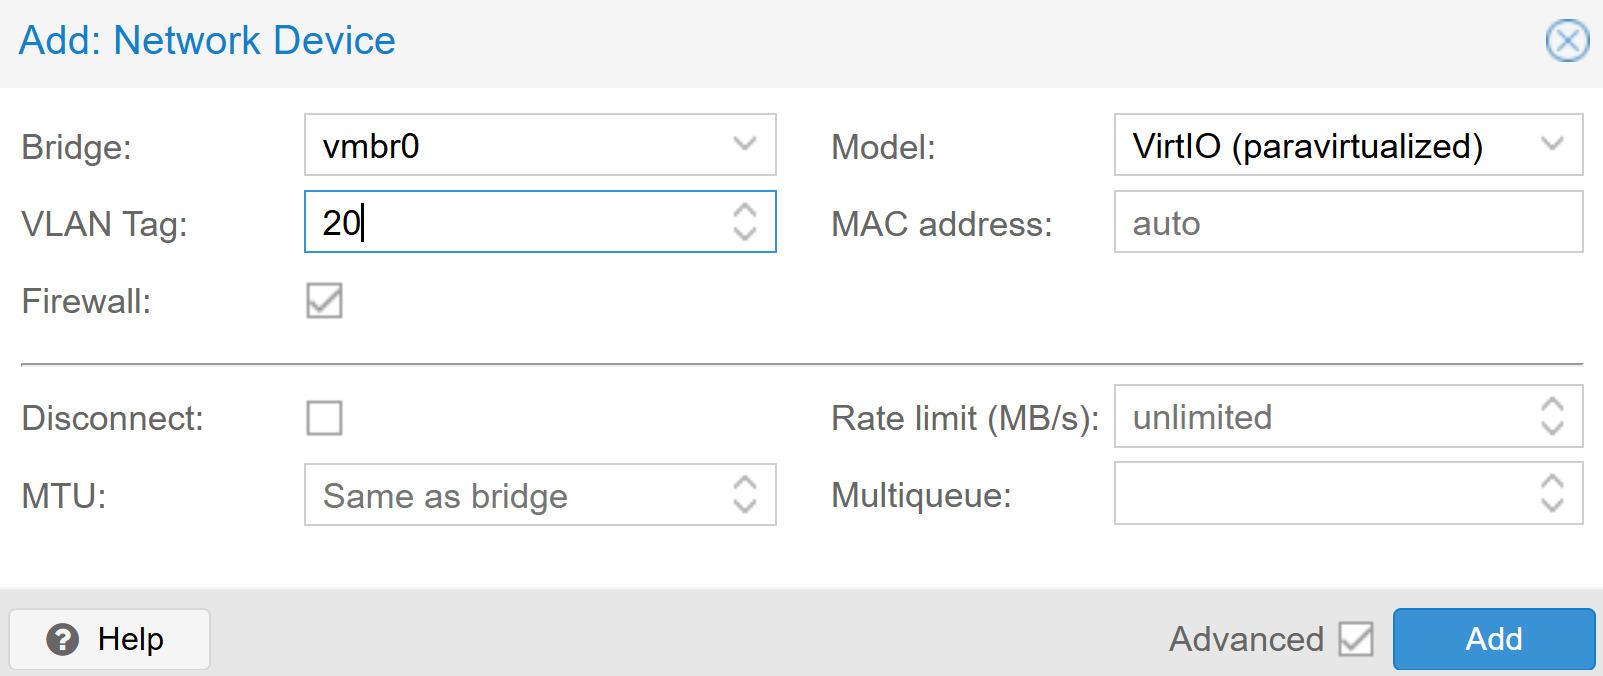
- Click “Add”.
- Click “Options”.
- Click “Boot Order”.
- Click “Edit”.
- Find your virtual DVD drive and move it to the top of the Boot Order.
-
Click “OK”.

- Click “Console”.
- Click “Start”.
- Boot to the OPNSense ISO.
-
Install OPNSense.
After you install OPNSense, you should have the following network topology on your proxmox server.
+------------------------+ | VLAN 1 (Home Network) | +------------------------+ | v +------------------------+ | Proxmox Server | | (Connected on VLAN 1) | +------------------------+ | v +----------------------------------+ | lab3-opnsense | | | | eth0 NIC ---> VLAN 1 | | eth1 NIC ---> VLAN 20 | +----------------------------------+ - Login to lab3-opnsense through the VM’s Console. The default username is “root” and the default password is “opnsense”.
- From the console for lab3-opnsense, choose option “7” for “Ping host” and verify that you can ping one of the IP addresses of Google’s Public DNS Resolvers, 8.8.8.8. If that is successful you are ready to verify that your OPNSense firewall can resolve DNS queries. Since OPNSense does not have nslookup or dig installed by default, choose option “7” for “Ping host” again and verify that you can ping google.com.
- Verify the eth0 IP address for your OPNSense VM and either set a static IP address or create a DHCP Reservation for the one eth0 received from DHCP.
You have installed an OPNSense firewall! In the next lab, we will create a Windows VM and connect it to the “LAN” network on the OPNSense firewall.
Here is a list of TryHackMe rooms that introduce networking concepts.
https://tryhackme.com/room/introtonetworking https://tryhackme.com/room/networkservices https://tryhackme.com/room/networkservices2 https://tryhackme.com/room/networkingconcepts https://tryhackme.com/room/networkingessentials https://tryhackme.com/room/networkingcoreprotocols https://tryhackme.com/room/networkingsecureprotocols
After you understand the basics of networking, you can start learning about network services such as firewalls, stateful packet inspection, IDS/IPS, URL filtering, application filtering, and SSL Inspection.
Here are two TryHackMe rooms that provide introduce firewalls and IDS/IPS (which are integrated in many modern firewalls).
https://tryhackme.com/room/idsfundamentals https://tryhackme.com/room/firewallfundamentals